How to Build an App on Ionic?
Try something new, looking for new aspects in different Framework just get me moved on. Currently I am working on AngularJS and Ionic Framework. Even a couple of months ago, when I thought about developing a mobile application, was to work on the native frameworks namely Objective C for iOS, Java for Android, and C# for Windows Phone.
I never ever thought that a mobile application can be developed using simple HTML, CSS and Javascript. And the most interesting part is that you can use the same code base for developing the app for different platforms (Android, iOS etc.) Here comes the idea of hybrid application.
Hybrid mobile apps are like any other apps you’ll find on your phone. You can even find them in app stores. It’s not something complex, I found it pretty interesting. So, I thought to take the new route of expression and share why I liked Ionic as a hybrid app development framework.
Ionic provides a library of mobile-optimized HTML, CSS and JS components, gestures, and tools for developing highly interactive apps. The cool part is it’s free and open source. Ionic is completely made up of Angular directives and components
Let’s jump start the discussion –
Initial Setup
We can start off minimum requirements to build an app in Ionic. First, make sure you have installed Node.js, JAVA, Android SDK, XCode IDE(for iOS) and Imagemagick (for adding app icon and splash screen).
Now to install Cordova, open the terminal and run this command.
$ sudo npm install -g cordova
To install Ionic simply run this command.
$ sudo npm install -g ionic
Creating Cordova project
Now we need to create a cordova project in your computer. For that run the command in the terminal.
$ ionic start myApp blank
This will create a folder ‘myApp’ in the particular directory in which the command was run. This actually creates a blank ionic app. Also you can run the following commands like:
$ ionic start myApp tabs
$ ionic start myApp sidemenu
These are some default project provided by the ionic.
Configure Platforms
Now we need to configure the platforms:
For Android: $ ionic platform add android

For iOS: $ionic platform add ios
Making Build and Testing
Testing in Browser
Testing your app in your desktop browser is very simple. Just go to the folder i.e the Cordova project folder and run the serve command.
$ ionic serve
It will start live-reload of your project. Any change made in the HTML, CSS and JavaScript file, will automatically reloaded when you save the file.You can also try:
$ ionic serve --lab
the — lab flag is quite new and shows how your app will look on ios & Android
Testing in Device
To test your app in the device you need to make build. For that run the following command.
$ ionic build <platform>
For Android:
$ ionic build android
Will find the build file in the following path:
../myApp/platforms/android/build/outputs/apk/android-debug.apk
For iOS:
$ ionic build ios
Will find the build file in the following path:
../myApp/platforms/ios/Myapp.xcodeproj
Then to run the app in the device, connect the device with your machine then run the following command.
Run the app:
For Android:
$ ionic run android
This run command will make the latest build at first and then will install it in the connected device. Now your first ionic app is in the device.
For iOS: Double Click on the Myapp.xcodeproj file. It will run in the Xcode.
Then you can select the device and install the app in the device. Also you can run the app in emulator for testing.
Add App Icon and Splash Screen
After the platform configuration you can find a folder named ‘Resources’ in the Cordova Project folder. Then in the resources folder keep the ‘icon.png’ and the ‘splash.png’. The format for the app icon. The splash can be ‘ .psd’ and ‘ .ai’.
The minimum dimensions for the app icon should be 192×192 px, and should not have rounded corners and for the splash the minimum dimensions should be 2208×2208 px.
Then run the following commands for generating the app icon and the splash screen:
$ ionic resources --icon
$ ionic resources --splash
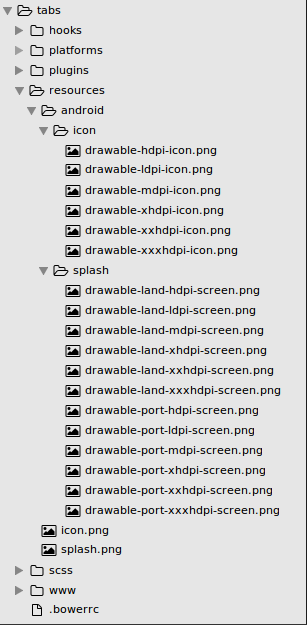
Then you can find two folder named as <platform>, Android and iOS in the ‘resources’ folder. See the screenshot below. These files are automatically linked in the config.xml.
Simple login example with Ionic
Most of the times we want to have a login at the beginning of our app. Handling a login with ionic is very easy. Let’s discuss how to implement a simple login. After successful login it will show a simple Dashboard.
So at first we need to create a Cordova Project. Here we are using the default tabs project provided by ionic.
$ ionic start loginApp tabs
Now let’s test this in the desktop browser. So run the command
$ ionic serve
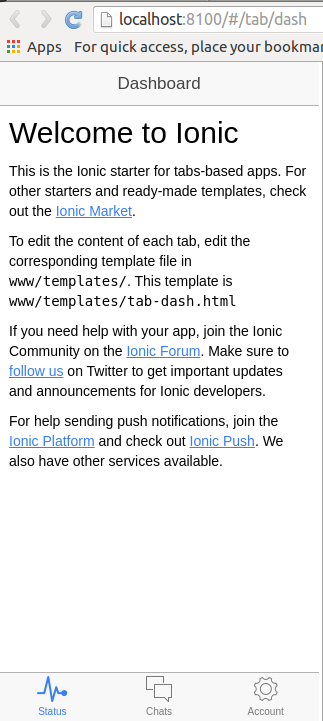
You can see this screen. The first screen of the default tabs project.
Now what we want is a login page at first and after successful login it will show the Dashboard. So we need to create a new route ‘login’ in the app.js
.state('login', {
      url: '/login',
      templateUrl: 'templates/login.html',
      controller: ‘loginCtrl’
  })
And also do this:
$urlRouterProvider.otherwise('/login');
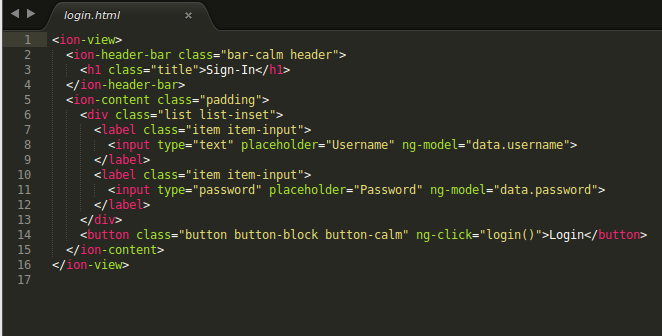
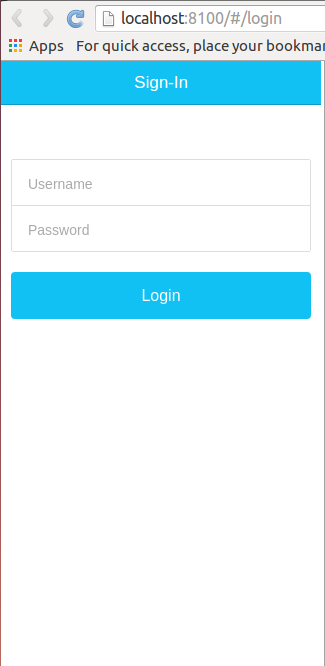
So we must add a new file in the www/templates folder, named login.html with this content:
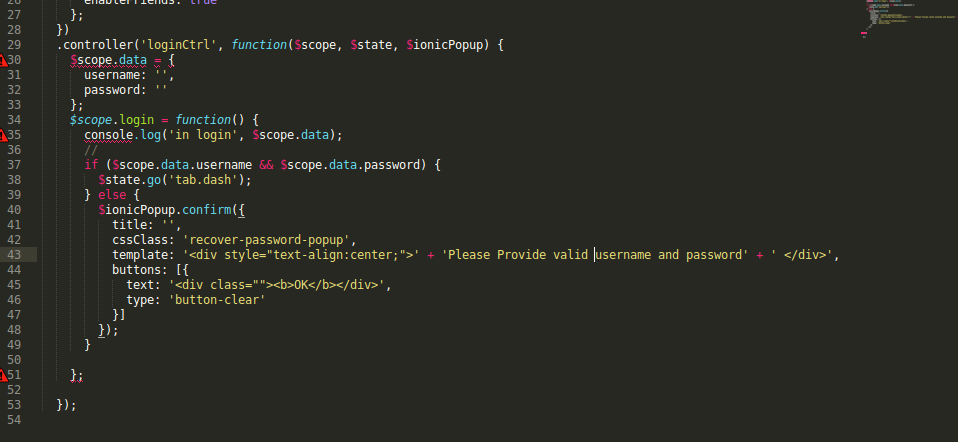
Now in the controllers.js add a new controller loginCtrl and write as below.
You can change the templates as you want and you can write your own CSS in the ‘style.css’ in www/css.
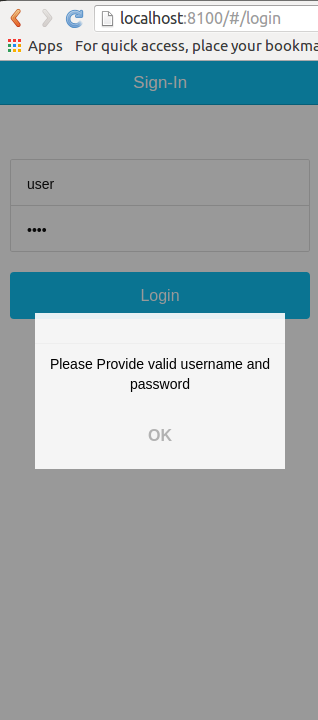
Now you can see the app with a login page as shown below. It will show a popup for invalid credentials.
(NOTE: Here only email format and blank validation is checked)
After successful login it will show the Dashboard.
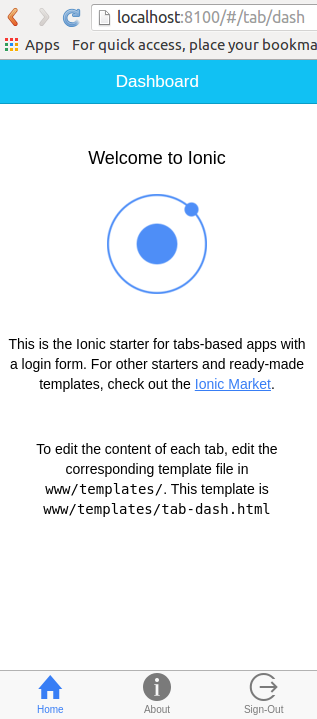
Ionic provides a basic folder structure when you create any new Cordova Project. They maintain all routes in ‘app.js’ and all the controllers in ‘controllers.js’ in ‘www/js’. But it is difficult to maintain such structure for a complex project. Like a basic Angular project in Ionic also, you can divide the functionality into modules as it is the requirement of the project. For example in this login app, you can have two modules like LogIn and Dashboard. You just need to write the Templates, CSS and JS files within the module and require all modules properly in the gulpfile.
Wrapping Up
I have used Ionic and it’s just awesome for developing hybrid apps. It has many in-build CSS and JS components. Go through the Ionic documentation once, since it’s very easy to use.
Hope it helps. Feel free to share your views. Any suggestion for improvement is highly appreciated.