UITabBarController – Know how to customize the tab bar controller
A mobile app user wants to see the most useful features of an app at the home page. But we can’t put all of the features on it for the obvious reason of space. To solve this issue and to make it easy for a user to browse through the pages in no time, UITabBarController is a one stop solution in iOS. In this blog, I’ll focus on view transition among the view controllers of the tab controller. If you know how to integrate a tab bar controller programmatically for a custom iphone app development, you can skip to the following paragraph.
A Brief Introduction to UITabBarController ::
It is a bunch of buttons, which can be found at the bottom of an iPhone screen and forms a great part of custom iPhone app development. When you click on any of it, specific view controller will be displayed. Let’s dive into implementation.
Implement Custom UITabBarController ::
You can implement it using both interface builder and programming. But here I am going to implement it programmatically. Please download this starter project .
Now, build and run the project.
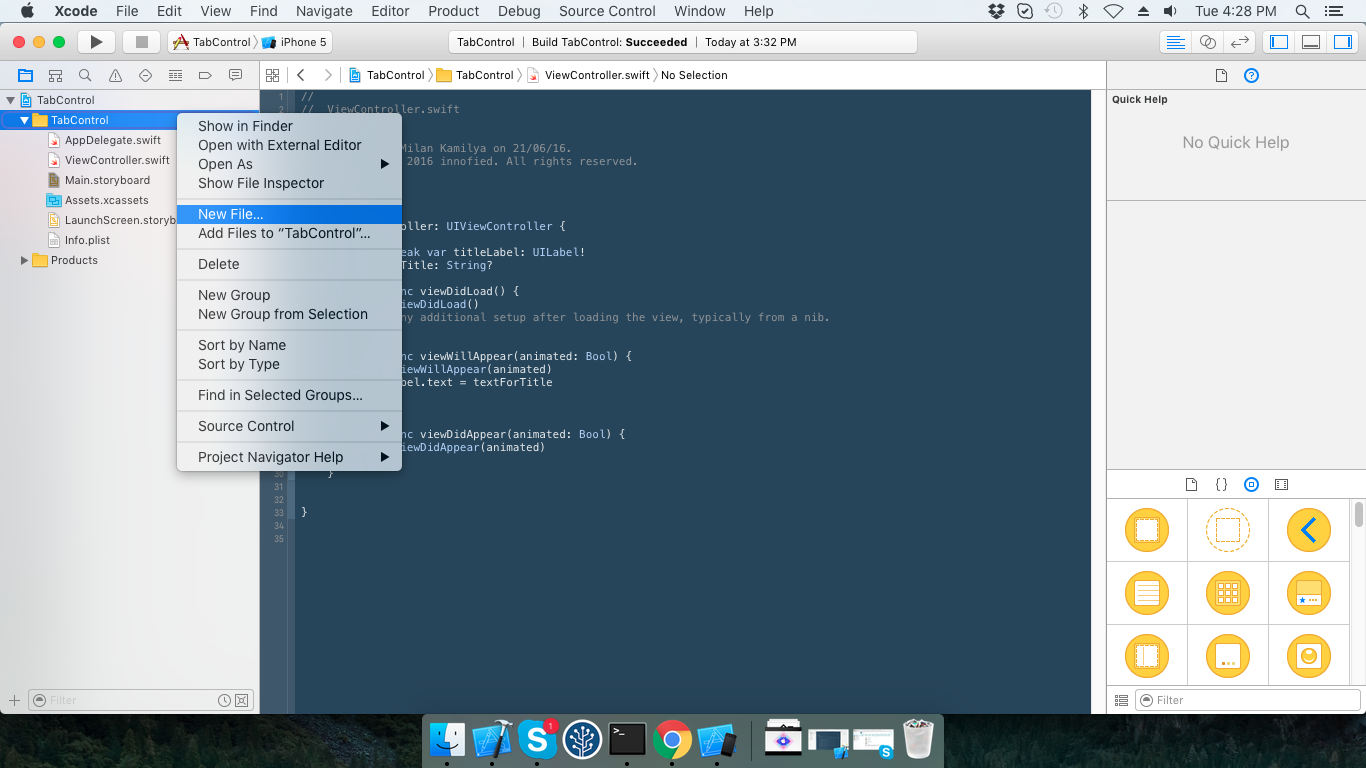
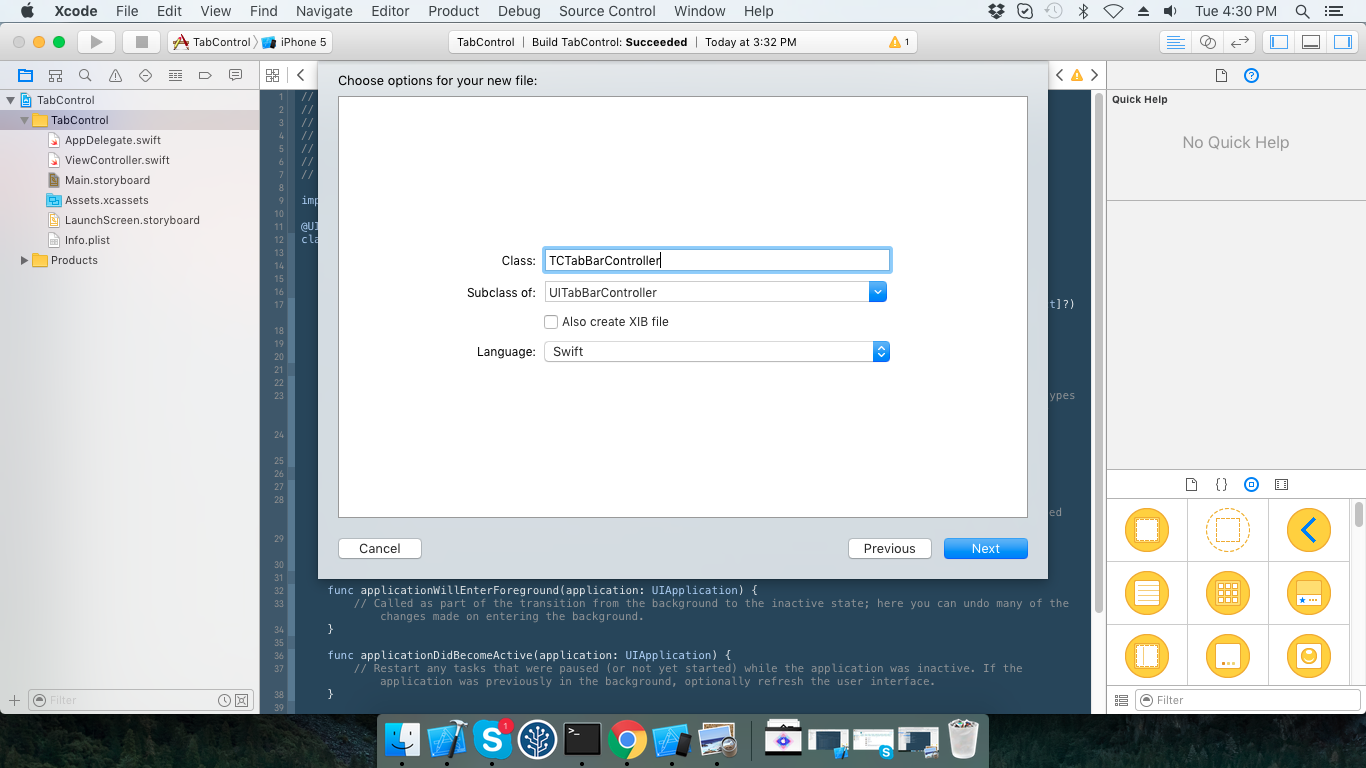
Wow! You didn’t find anything in it. Sorry! It is empty. Now create a new file of type /Source/Cocoa Touch Class. Give a name to it and inherit “UITabBarController” class.
Now, we will implement the TabBarController and proceed for other steps to custom iPhone app development. As you see we need a few icons and view controllers to display. So, we need to create an array of images, titles & view controllers. You may worry about the images and number of view controllers. Just don’t, your starter project contains all the required images. Here, we will use a single view controller and create multiple instances of it. Now add this method at the bottom of AppDelegate.
func getArrayOfViewController() -> [ViewController] {
       var arrayOfVC = [ViewController]()
       let storyboard = UIStoryboard.init(name: "Main", bundle: NSBundle.mainBundle())
       // Append View Controllers
       return arrayOfVC
   }
This method will be used to create an array of view controllers. There is a ViewController class in this project. It has a scene / interface in Main.storyboard. We will need an instance of Main storyboard to instantiate the view controller.
We will take five view controllers. So add the following code in place of “//Append View Controllers”.
for i in 0..<5 {
     let vc = storyboard.instantiateViewControllerWithIdentifier("ViewController") as! ViewController
     // customise controllers
     arrayOfVC.append(vc)
}
To identify these view controllers, we need to customize them. We will change the background colour and title of the view controller. To do that add following codes in “// customise controllers”
vc.textForTitle = arrayOfImages[i]
vc.view.backgroundColor = arrayOfColors[i]
Add following codes just after the declaration of class AppDelegate.
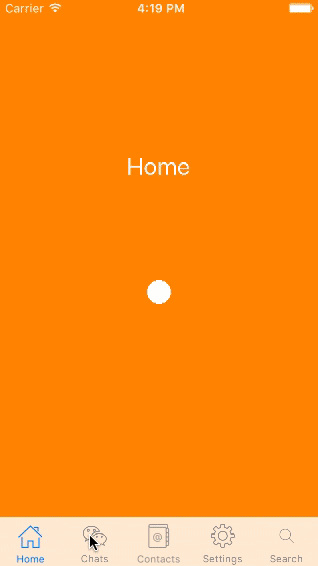
let arrayOfImages = [ "Home", "Chats", "Contacts", "Settings", "Search"]
let arrayOfColors = [ UIColor.orangeColor(), UIColor.brownColor(), UIColor.greenColor(), UIColor.redColor(), UIColor.blueColor()]
Now, we will create an instance of TCTabBarController in application:didFinishLaunchingWithOptions before return true. And assign all view controllers which we created in the previous method.
let tabBar = TCTabBarController()
tabBar.viewControllers = self.getArrayOfViewController()

// set tabBar as root
We want to set tabBar controller appears after launch screen. So, rootViewController of the window will be assigned with tabBar and call makeKeyAndVisible(). Replace “//set tabBar as root” with following code at the bottom of the method.
self.window?.rootViewController = tabBar
self.window?.makeKeyAndVisible()
Now, it’s time to see what we did so far. Let’s run the project.
Wow! View controller has improved from the previous one. But, can’t find the tab bar. Just randomly click on the bottom of the view controller. Oh yeah!! View controllers are changing, but what about icons?
Well, we will customize the tab bar now. UITabBarController has a property, called “tabBar”. It is the bar, which is visible at the bottom of the view controller. It has a property, called “items”. It contains UITabBarItem. We need to customize these BarItems. We will set image and title to them.
func customiseTabItems(tabBar: UITabBar) {
       for item in tabBar.items! {
           item.image = UIImage(named: arrayOfImages[tabBar.items!.indexOf(item)!])
           item.title = arrayOfImages[tabBar.items!.indexOf(item)!]
       }
}
Call this method from application:didFinishLaunchingWithOptions after assigning the array of view controllers.
self.customiseTabItems(tabBar.tabBar)
Now Run the app and see.
Wow!! We did it.
You can download complete code here.
Behind the View Transition:
In this section, we will change the default view transition animation to a customized one. Let us move to the second stage of iOS development with UITabBar. Before going to implementation, we need to know how this transition works.
After any TabBarItem getting pressed, UITabBarControllerDelegate call tabBarController(: animationControllerForTransitionFromViewController:toViewController:) -> UIViewControllerAnimatedTransitioning? delegate method. If we want any custom transition animation we have created a class inheriting UIViewControllerAnimatedTransitioning class and return instance through this delegate call.
If any UIViewControllerAnimatedTransitioning type instance return to the delegate, it will call transitionDuration() and animateTransition() of the UIViewControllerAnimatedTransitioning instance.
When transitionDuration() method will be called, we need to return the duration for animating two views. Whole work of animation will be performed inside animateTransition().
Implement the View Transition:
We will create an animator class to handle the animation between two view controller in this custom iphone app development. So, click File/ New / File and choose the template iOSSourceCocoa Touch Class. Write the name of this class as “SwapAnimator” and inherit NSObject.
Open SwapAnimator.swift and update the class definition to “SwapAnimator : NSObject, UIViewControllerAnimatedTransitioning “.
Don’t worry about the error. When you will implement transitionDuration and animateTransition, these errors will go away.
Now add following property to SwapAnimator
let animationDuration = 1.0
weak var storedContext: UIViewControllerContextTransitioning?
It is time to implement transitionDuration. Return animaitonDuration from this method.
func transitionDuration(transitionContext: UIViewControllerContextTransitioning?) -> NSTimeInterval {
     return animationDuration
}
Now, we will implement animateTransition. All errors go away, don’t they?
Add a property of SwapAnimator to TCTabBarController.
let swapAnimator = SwapAnimator()
Now we will implement UITabBarControllerDelegate in TCTabBarController and tabBarController(:_ animationControllerForTransitionFromViewController: toViewController:) -> UIViewControllerAnimatedTransitioning? Method.
extension TCTabBarController : UITabBarControllerDelegate {
   func tabBarController(tabBarController: UITabBarController, animationControllerForTransitionFromViewController fromVC: UIViewController, toViewController toVC: UIViewController) -> UIViewControllerAnimatedTransitioning? {
       return swapAnimator
   }
}
Don’t forget to assign delegate of UITabBarController to self within viewDidLoad().
self.delegate = self
Run the app and see if there are any new changes in the view. Oh! No!! Nothing has changed!
Wait, we have to write code for animation. Now, create instance for the view to show next and the view to remove from containView inside animateTransition() method. And also add toView to containerView of transitionContext.
storedContext = transitionContext
let toView = transitionContext.viewForKey(UITransitionContextToViewKey)
let fromView = transitionContext.viewForKey(UITransitionContextFromViewKey)
transitionContext.containerView()?.addSubview(toView!)
We will define an animation to animate the fromView.
let animation = CABasicAnimation(keyPath: "transform")
animation.fromValue = NSValue(CATransform3D: CATransform3DIdentity)
animation.toValue = NSValue(CATransform3D:
  CATransform3DConcat(
    CATransform3DMakeTranslation(0.0, -10.0, 0.0),
    CATransform3DMakeScale(150.0, 150.0, 1.0)
  )
)
Now, we will refine the animation and add it to fromVIew.layer.
animation.duration = animationDuration
animation.delegate = self
animation.fillMode = kCAFillModeForwards
animation.removedOnCompletion = false
animation.timingFunction = CAMediaTimingFunction(name: kCAMediaTimingFunctionEaseIn)

fromView?.layer.addAnimation(animation, forKey: nil)
Run the app and see. Still, nothing has changed.
The animation on fromView isn’t working because is hidden by toView. As we add toView to containerView before the starting of the animation, so the toView overrides the fromView. So, we will set initial alpha zero to toView and put an animation to make it 1.0 .
let fadeIn = CABasicAnimation(keyPath: "opacity")
fadeIn.fromValue = 0.0
fadeIn.toValue = 1.0
fadeIn.duration = animationDuration

toView!.layer.addAnimation(fadeIn, forKey: nil)
Now, run it and see. The animation is working but the whole bar gets disabled after the first click. We didn’t call animation completion method and property storedContext was not released. Along with them, we have to release all animation from fromView.layer. Add the following method at the bottom of animateTransition method.
override func animationDidStop(anim: CAAnimation, finished flag: Bool) {
       if let context = storedContext {
           context.completeTransition(!context.transitionWasCancelled())
           let fromView = context.viewForKey(UITransitionContextFromViewKey)
           fromView?.layer.removeAllAnimations()
       }
       storedContext = nil
}
Now, run and see it. Not bad!
We will make it even better. Open ViewController.swift and look into viewDidLoad(). You definitely find the circleLayer which has not been added to the layer. So, uncomment the line of code.
view.layer.addSublayer(circle)
Now, run it and see. Wow!
You can download complete code here.
Why does the white spot appear over all the views? It is nothing but the circleLayer. I want you to rectify it as an assignment.
What’s Next?
Hope now you have an idea of view transition that forms an important part in any custom iphone app development. This similar idea works in changes view transition in Navigation Control, Modal segue etc. Here, we did animation without letting a user interact with the screen. It is also possible to give an awesome experience to the user by this tutorial of interactive view transition .